3.1 Turning the Machine On
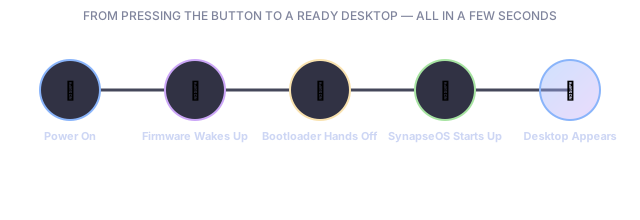
Before SynapseOS itself even runs, the computer's built-in startup firmware (called UEFI on modern machines) takes the first few steps on its own:
- It runs a quick self-check and takes stock of what hardware is plugged in.
- It looks on the boot disk for a small startup program and loads it into memory.
- It hands that program some useful information about the machine — like where the screen memory lives and how much RAM is installed — before stepping out of the way.
Older computers that use the previous-generation startup method (called "BIOS" or "Legacy boot") are also supported through a slightly different path, so the same disc can boot on both older and newer machines.
3.2 The Bootloader
The small startup program mentioned above is called a bootloader — its only job is to find the real operating system on disk, load it into memory, and jump into it. SynapseOS uses a well-established, open-source bootloader called Limine rather than writing this delicate first step from scratch.
Before handing off, Limine takes care of a few important chores on SynapseOS's behalf:
- Sets up the computer's memory addressing so the system can use its full address space.
- Builds that "direct mirror" of physical memory mentioned in Chapter 2, so SynapseOS never has to manage low-level memory maps itself.
- Leaves interrupts (hardware "tap on the shoulder" signals) switched off until SynapseOS is ready to handle them.
3.3 Loading the System
Once Limine finds the SynapseOS system file on disk, it loads it into a fixed spot in memory and jumps to its very first instruction. From that point on, SynapseOS is fully in control of the computer — there's no going back to the bootloader or the firmware.
3.4 Getting Ready, Step by Step
The first thing SynapseOS does is work through an internal checklist, in a fixed order, to bring every part of the system online safely. Roughly, that looks like:
Keeping a Diagnostic Log
Every one of those steps prints a short status line to a diagnostic output that a technician can read — even if the screen itself never manages to turn on. It's the equivalent of a car mechanic's diagnostic printout: not something an everyday user needs to see, but invaluable if something goes wrong.
3.5 Waking Up the Hardware
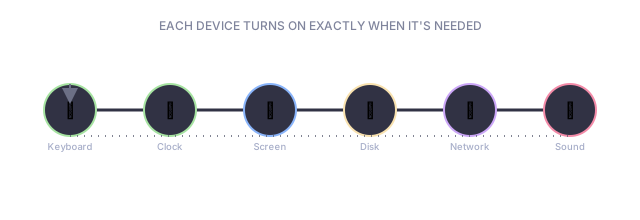
Each piece of hardware is brought online at the point in the checklist where it's actually needed:
| Hardware | When It Comes Online |
|---|---|
| Keyboard signal handling | Early, before anything else can safely run |
| System clock | The first time anything needs to measure elapsed time |
| Hardware information table | Shortly after startup, before the screen turns on |
| Screen / graphics | As soon as the desktop system starts up |
| Keyboard (both older PS/2 and modern USB types) | During desktop startup |
| Disk drive | The first time a file needs to be read from the actual disk |
| Filing system | Right after the disk drive is confirmed working |
| Network card | After the desktop is up and running |
| Sound card | Just before hardware signals are switched on |
3.6 From Welcome Screen to Desktop
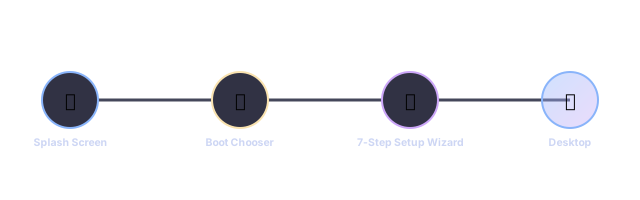
The very last stretch of startup is the part you actually see and interact with:
- Splash screen — an animated SynapseOS logo appears while final touches finish.
- Boot chooser — if more than one startup option is set up, you're asked which one to use.
- First-time setup — the very first time SynapseOS starts on a machine, a short
7-step welcome wizard walks you through the basics:
- Welcome screen and language choice
- Keyboard layout
- Choosing a username and computer name
- Timezone
- Visual theme (light or dark)
- Optionally installing SynapseOS permanently to a disk
- A summary screen with a "Start SynapseOS" button
- Desktop — after the welcome wizard finishes (or immediately, on every later startup), the full desktop appears and you're ready to use the system.